Results from tying reeds.
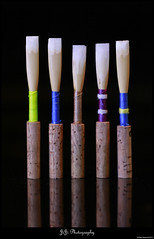
A few weeks ago, someone at the BBoard had asked me to show high-definition pictures of my reeds tied using the Cane Guide (le Guide Roseau) and pre-binding. Look at the very large size of the picture by clicking on them: this will bring you to my wife’s photo stream where you can choose “original size”. The binding colors are reeds with the following characteristics (from left to right):
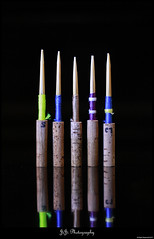 Yellow (neon green): Shaped with a Weber Wide (0.60mm gouge) and tied using the Cane Guide on a Stevens #3 thin wall staple. This reed has not yet been chopped (only scraped for blank storage).
 - Blue: Kunibert Michel 7.25 shaper with my own 0.57mm gouge tied on a Chiarugi #3 staple using the Guide Roseau. This reed has been scraped a 1st time and is playing remarkably well. A very slight slipping can be noticed. Evidently, it is not slipped at all near the thread and the blades are rather loose. I probably tied it too long and not tightly enough. At 73.5mm total length, it plays at A=440 to A=442 without any problem.
- Gold: Kunibert Michel 7.25 shaper with my own 0.59mm gouge tied on a Chiarugi #3 staple without any binding aid. This reed was finish scraped several months ago. There is a good sized offset on this one (it often slips even more while playing) that flares from binding to end.
 This means I did not hold the blades well aligned when binding. The reed still plays very freely, though the dynamic range is limited. I think the limited range is due to the offset, but the free playing is from a good selection of nicely flat cane.
 - Purple with 2 white bands: RDG –2 shaper (0.61mm gouge) tied on a Chiarugi #3 staple without any pre-binding aid. There is a moderate offset on this one which inhibits both free playing and dynamic range, otherwise, the reed is stable and responsive. The binding looks higher on this one than the others: most of my reeds finish the winding 1-2 winds before the end of the staple, so this one might be tied all the way to the end. It could also have half or one wind past the end, which would explain the inhibition. But usually, reeds that wind past the staple behave much worse.
- Blue with 1 yellow band: Kunibert Michel 7.50 shaper with my own 0.58mm gouge on a Chiarugi #7 staple. Not yet chopped (only scraped for blank storage).
Making good reeds is easy!
I have irked many people by saying this before, but I stick to that statement! It’s all about selecting the proper cane and shaper and binding properly. Here are some sound clips of the blue and gold reeds for a sound comparison. Note the blue one took my less than 5 minutes to scrape to get to this point! Also note that I am not making huge efforts for dynamic expression: I just wanted to get an idea of how they sound. Be careful: the 1st time a reed is scraped, it often plays very well quickly. Do not try to get it perfect on the 1st “sitting”: reeds tend to harden-up after a day and its best to do a 2nd scraping the next day and a 3rd scraping a week later.
On the 2nd and 3rd scraping, the reed should become as good as it gets, tough some adjustments can be made after that still.
Most important, never try to make a decent reed “perfect” when you’re tired and/or frustrated: you will ruin it irreparably!
Theory of Reed Slipping (offset in the binding)
The following is explained at length in Jay Light’s book and the question has been asked on the BBoard. Many prolific oboists of the American reed technique do on purpose to offset the blades of their reeds while binding. I don’t like this mis-alignment, but it works for a whole lot of people and I did get a few really good reeds that way.
The question asked if it is OK for the cane to slip such that both sides of one blade are inside the other blade. Well, if a cane is correctly shaped and folded, this is impossible! For good slipping, when tying a good piece of cane, the symmetry will make one edge of each blade overlap the other. In other words, if only one side of the reed is slipped, something is wrong; if one blade is fully “inside” the other, it was not folded in the middle of the shape! So in other words, my preference is for the last diagram in this slide-show; the 2 middle diagrams are OK by American standards and the 1st is just plain wrong.
One thing I should note is that many people believe it is necessary to offset the blades to prevent air leaks: this is completely false as most of my reeds that leak also have offsets whereas those that are tied in perfect alignment never do.


